replace the print cartridges
A message appears on the front panel display to let you know when the ink level
for the print cartridge is low. In addition, you can check the ink levels through the
HP Director on your computer. For information, see
check the ink levels
on
page 79. When you receive this message, it is recommended that you have a
replacement print cartridge available. You should also replace the print
cartridges when you see faded text or if you experience print quality issues
related to the print cartridges.
You may also need these instructions to remove the black print cartridge when
you want to use the photo print cartridge for printing high-quality photos.
For information on ordering replacement print cartridges, see
order print
cartridges
on page 75.
1
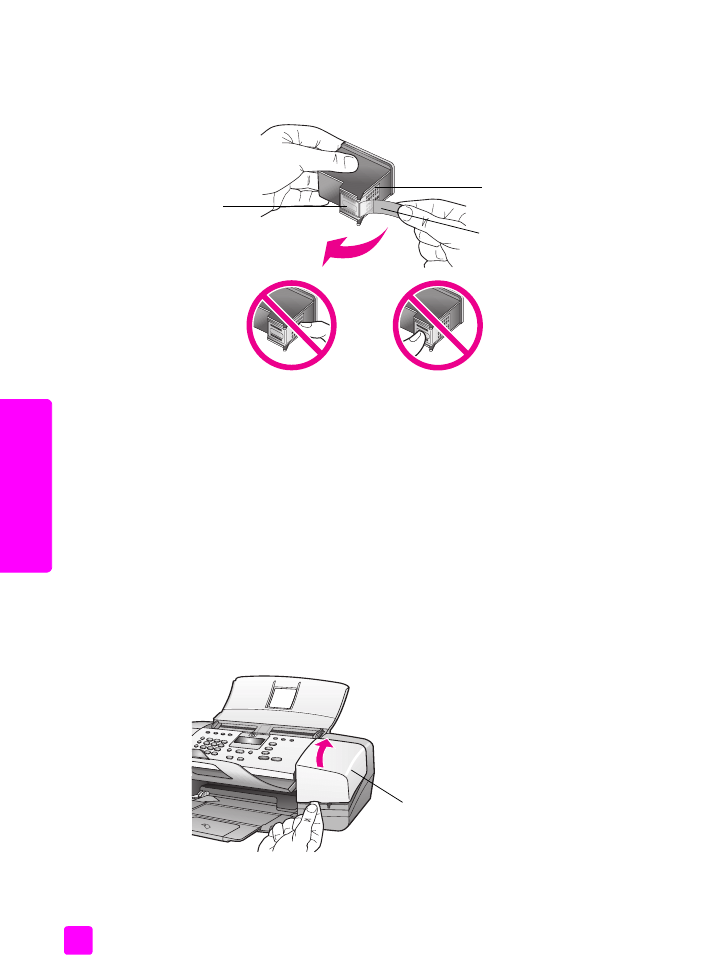
Turn on the HP Officejet, and then lift open the print-carriage access door.
The print carriage moves into view.
Plastic tape with
pink pull tab
(must be removed)
Gold-colored
contacts
Ink nozzles
under tape
Do not touch the gold-colored contacts or the ink nozzles
Print-carriage
access door
user guide
maintain your hp officejet
83
maintain y
our hp o
ffi
cejet
2
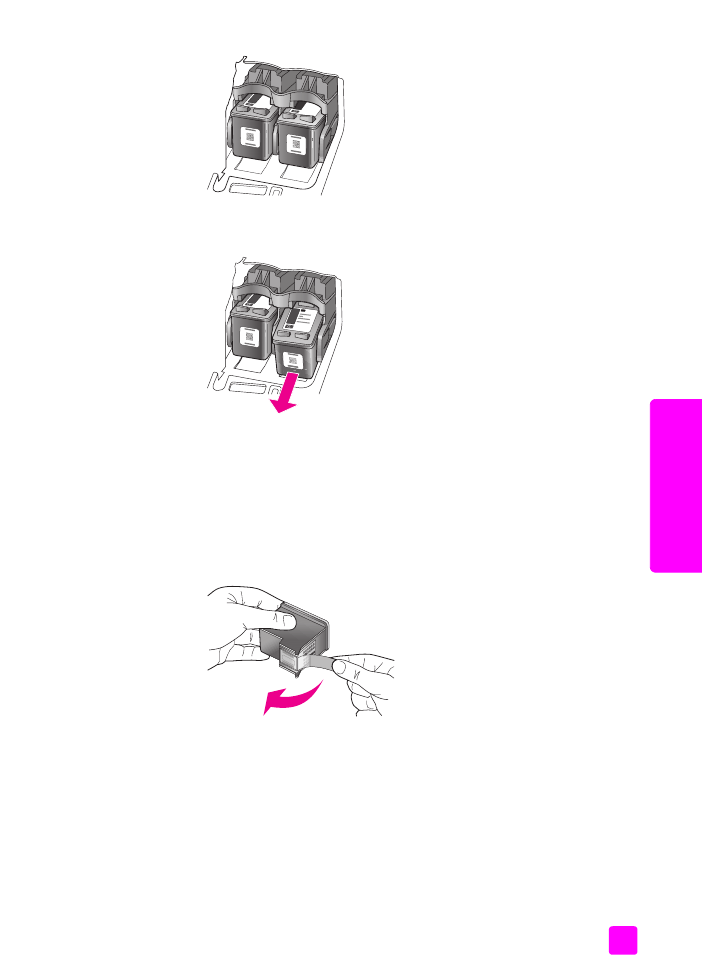
After the carriage stops moving, push down on the top of the print
cartridge to release it, and then pull it toward you out of its slot.
Note:
It is normal to see ink buildup in the print cartridge slots.
3
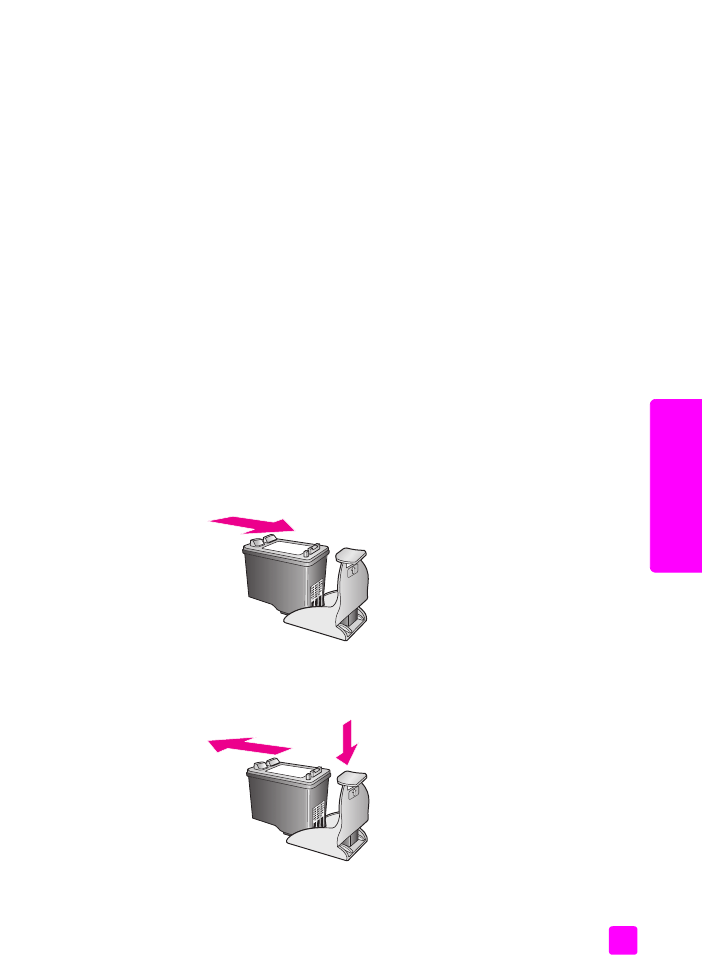
If you are removing the black print cartridge in order to install the photo
print cartridge, store it in the print cartridge protector. For more information
on the print cartridge protector, see
use the print cartridge protector
on
page 85.
4
Remove the new print cartridge from its packaging and, being careful to
touch only the black plastic, gently remove the tape by using the pink pull
tab.
Caution!
Do not touch the gold-colored contacts or ink nozzles.
Once you have removed the plastic tape, install the print cartridge
immediately to prevent the ink from drying in the nozzles.
hp officejet 4200 series
chapter 8
84
maintain y
our hp o
ff
icejet
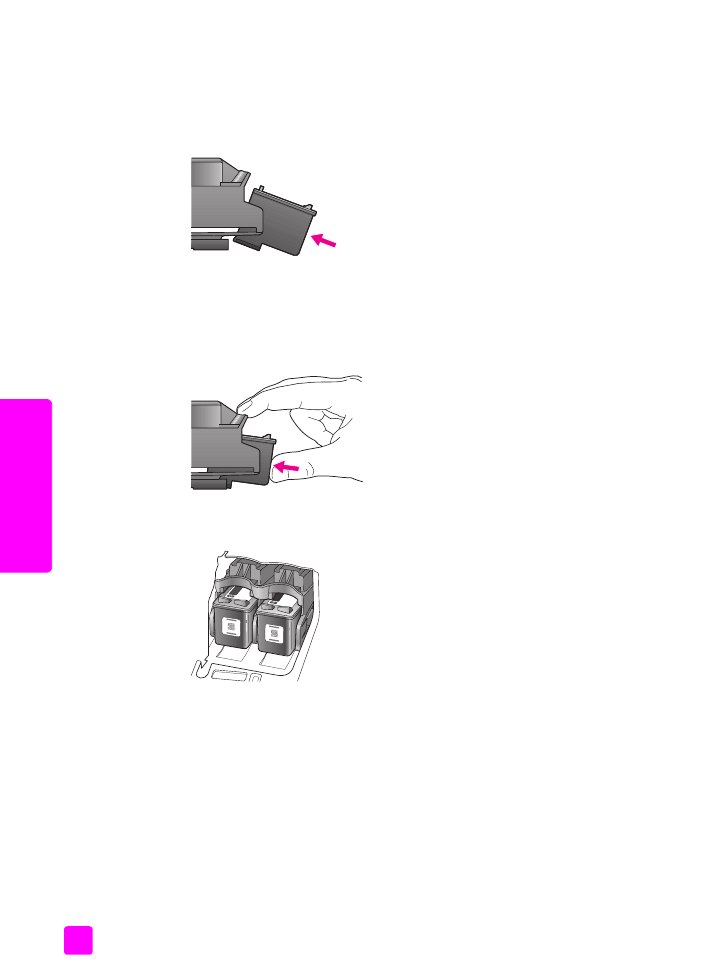
5
Hold the black or photo print cartridge with the HP label on top. Slide the
print cartridge at a slight angle up into the
right side of the print carriage.
Press firmly until the print cartridge snaps into place.
Caution!
Do not attempt to push the cartridge straight into the slot.
It must slide in at a upward slight angle.
6
Hold the tri-color print cartridge with the HP label on top. Slide the print
cartridge at a slight angle into the
left side of the print carriage.
Press firmly until the print cartridge snaps into place.
Caution!
Do not attempt to push the cartridge straight into the slot.
It must slide in at a slight upward angle.
Note:
You must install
both print cartridges in order for your HP Officejet to
work.
7
Close the print-carriage access door.
“Press OK to print Align page” appears on the display.
8
Press
OK
.
For information on aligning the print cartridges, see
align the print
cartridges
on page 86.
user guide
maintain your hp officejet
85
maintain y
our hp o
ffi
cejet